|
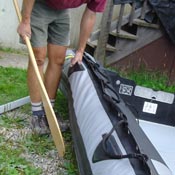
Inflatable Boat Assembly: How To Put All Those Parts TogetherInflatable boat assembly is quite easy once you have done it once or twice. Fortunately, there are not too many inflatable boat parts to put together. First, roll out your boat on a flat surface free of sharp objects. Locate your valves. Most valves are either one or two parts. The two part valves have one part with a one way valve and the second part is simply an airtight cap. One part valves have the one-way valve built in. Pushing the spring loaded inner valve will release air (some you push and turn to lock open) Make sure the valve is set to not allow air back out before you start blowing up the boat.
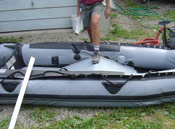
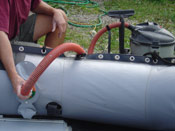
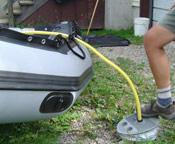
I like to use my shop vac to inflate my inflatable boat when I am at home. I make sure the vacuum is clean inside, so I am not blowing dust into the tubes. Switch the hose on your shop vac so it is in "blow" mode.
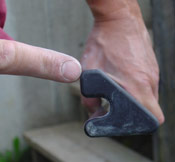
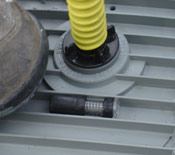
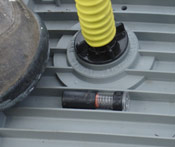
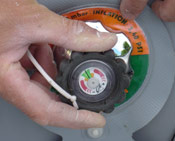
If you have these valves turn each valve to the inflation position. (notice where my finger is pointing to the arrow on the valve - on the fabric tab under the valve it says "inflation"). Now cap off one valve and you can pump up all three chambers from the other valve. Remember to turn both valves to the "navigation" position before heading out on the water.
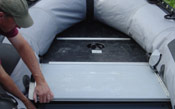
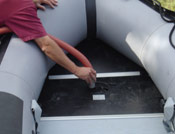
If you are assembling a used boat for the first time, and there are no stickers, look for wear marks from the keel tube along the center of the floor boards. These wear marks should go down. Again, on mine there are nice stickers to indicate their location. Some floor boards have small half circles cut out of the back of the stern-most floor board to allow clearance for the drain valves. Notice the black plastic blocks on the sides of the floor section. These are spacer blocks to center the stringer that will be inserted later. These spacers go towards the stern. On most wooden floors there will not be spacer blocks, the side of the floor board will simply be cut to hold the stringer in the correct place.
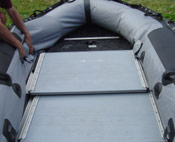
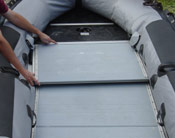
Here is the stern floor board tucked under the tubes on the sides and ready to slide into the aluminum channel mounted on the transom. Many boats simply have two wooden blocks on the transom that the floor slides under.
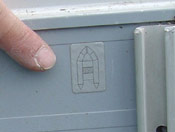
Notice the little decal with a picture showing the location of this floor section.
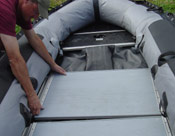
Install the second main floor board by tucking it under the edges of the tubes, and connecting it to the stern floor section.
On aluminum floors like this one for the Grand Raid, there is an aluminum piece that extends out from the bottom side of each floor board, so the floor sections are all the same width.
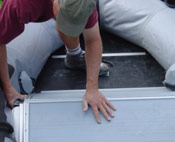
The last floor piece is the trickiest one. First place it in the boat.
Place your oars or paddles under each edge of the inflatable boat so all three of the main floor boards rest on them. Make sure the floor boards are overhanging the oars, as this creates space for installing the stringer as well as making sure the floor boards lie flat.
Now get the front edge of the last floor board in place. I am pointing to it with my left hand.
Lift the back edge of the last floor board, and the front edge of the center floor board until the tongue and groove on the edges are connected.
Line everything up, with all the channels and floor board edges ready to be pushed together.
This is what the floor will look like before you start pushing down.
Get one stringer ready to install. I am pointing to the top end of one stringer. Notice the sloped edge will go to the outside, and the bottom edge is flat. The groove fits over the edge of the floor boards locking the three main floor sections together.
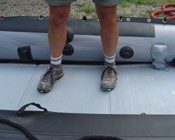
You can push down with your hands or feet. On large collapsible boats you may need to jump on the floor boards to get them pushed down.
It is not difficult once you are used to it, but the first time you put your inflatable boat together it may seem like a challenging task.
Installing the stringers is often considered the most challenging part of the assembly. You can install the stringer from inside your inflatable boat.
Or from outside the inflatable boat.
Here it is locked into place on the edge of the floor boards.
Installing the second stringer is a breeze once the first one is in place.
Now you can finish filling the inflatable boat tubes with your pump or shopvac.
If using a shopvac or electric pump always top up the pressure with your foot pump.
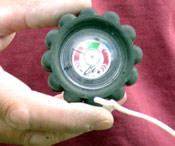
My foot pump has a built in pressure gauge which operates while you are pressing it down. This photo shows not enough pressure yet.
This photo shows the small orange spring loaded marker is starting to move. When the orange indicator is about one third of the way across, the pressure in my inflatable boat is correct. I know because I checked it with the hand held pressure guage. Almost there.
A hand held pressure gauge like this one is handy to make sure you have the correct pressure.
Notice the pressure in the tubes is in the green zone. Good to go!
Don't forget to inflate your keel, top it up with your footpump, and check the pressure if you have a pressure gauge.
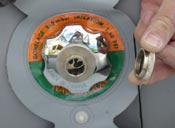
Finally install your valve caps to ensure you don't loose pressure.
If you have intercommunicating valves, don't forget to turn them to "Navigation".
|
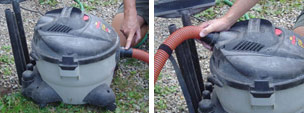
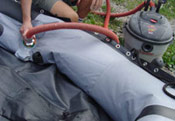 I thought I would need a special adapter, but simply holding the hose tight to the valve body gives enough of a seal to blow up the tubes. It works very well!
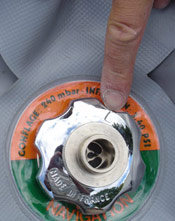 On my new Zodiac Grand Raid the valves are fancy "intercommunicating valves" so I can blow up the three main tubes from one valve. Very nice!
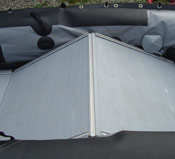
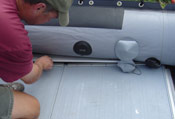
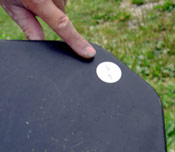 Locate the bow piece. My inflatable boat has stickers on the floor boards to indicate which side is the sunny side. Sunny side goes up.
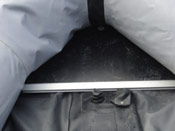 Insert the one,two or three bow pieces, depending on your boat size. The bow pieces will have a hole cut in them which will line up with the valve for the keel. Make sure your keel valve lines up.
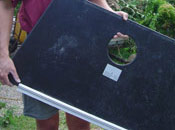 Notice on the Zodiac Mark II Grand Raid that the keel valve hole is in the second bow floor board
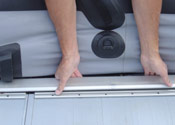
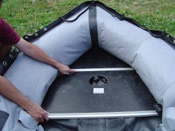 Notice how the inflatable keel valve lines up with the hole. On this boat each floor section has an aluminum channel on the edge which meshes with the adjoining floor board.
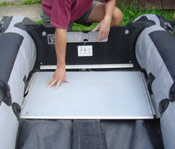
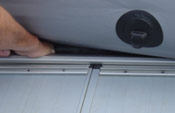
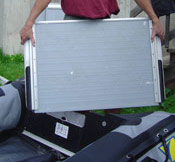 Find the floor board which goes at the back (stern) of the boat. Notice that on this boat the main floor sections are made of aluminum.